Showing posts with label Baking. Show all posts

Thursday, November 8, 2012

Pulled Pork Sandwiches (On Homemade Rolls)!!

I'm BACK!!!!  Just over 1 month since the last post and I am sure you ALL missed me....all nine of you!!  I joke, I joke.  Sometimes time and lack of motivation get in the way of posting, but what I ate last night for dinner was just TOO good to pass up putting it on the blog.
To make up for it, here are two recipes in one!!  Homemade rolls AND Carmelized Onion Pulled Pork.


In honor of the election I felt like I should make something that felt "American."  So, I decided BBQ could be fitting.  Don't be mistaken, the carmelized onion sauce on the pork tastes pretty close to barbeque sauce, but had a nice smoky and spicy flavor to go with it.  Also, the rolls I made were a bit sweet since they include sugar and cinnamon, and it complemented the sauce on the pork quite well.  I don't have a sophisticated palate by any stretch of the imagination, but my taste buds can distinguish delicious and these are definitely delicious!!  Plus, I just had some of these leftovers and they were just as yummy as the first time.

The rolls recipe came from the blog High Altitude Bakes.
The pork recipe came from the blog Eating Well.

THE CARAMELIZED ONION PULLED PORK
Ingredients:
  • 2 1/2 - 3 lbs boneless pork shoulder / butt roast, fat trimmed
  • 1 T Olive Oil
  • 3 Large Onions, sliced thin
  • 1/3 C Sugar
  • 4 Large garlic cloves, minced 
  • 1 t Oregano 
  • 1 t Ground pepper
  • 1/2 t Salt
  • 1/3 C Cider Vinegar
  • 1 C Chili sauce - you can find this in the condiments aisle, usually close to the ketchup or marinades
  • 2-3 t Canned chilis in adobo sauce, minced (I used 2t and it wasn't very spicy but had a mild spicy flavor) - these are found near the hispanic food section, get a small can.
Directions:
  1. Trim fat from pork and place in a 3-4qt slow cooker.
  2. In a large skillet, heat the oil over medium-high heat
  3. Add onions to oil and cook, stirring occasionally, until the onions are soft.  This was about 8-10 minutes for me.  The size of your skillet will impact cooking time.
  4. Add sugar to onion, mix together, and cook until onions begin to brown and caramelize.  This could be up to another 10 minutes.
  5. Add garlic, oregano, salt, and pepper to skillet, mix together and cook for 1 minute.
  6. Add the cider to the skillet, stir and cook until evaporated.  This takes about 30 seconds.
  7.  Remove from the heat and stir in the chili sauce and the minced chili peppers in adobo sauce.
  8. Pour prepared sauce over the pork.
  9. Cover and cook on high for 4 hours or low for 8 hours, until pork falls apart.
  10. Once cooked, using two forks, shred the pork.  You can do this in the slow cooker (be careful not to scratch the bottom of the slow cooker) or you can put the pork on a plate for this step.
  11. If pork was removed from slow cooker for shredding, return to slow cooker and mix pulled pork in with the remaining sauce.
  12. Serve warm on your favorite rolls (see below) and enjoy with family and friends.  It is also yummy by itself!!

THE BUNS
Ingredients:
  • 1 T Yeast
  • 1 C Warm water
  • 1/4 C Canola Oil
  • 1 Egg
  • 2/3 C Sugar
  • 1 1/2 C Warm water
  • 5 C All-Purpose
  • 2 C Whole Wheat Flour
  • 1 T Sea salt
  • Pinch of Cinnamon
  • Extra olive oil and salt
Directions:
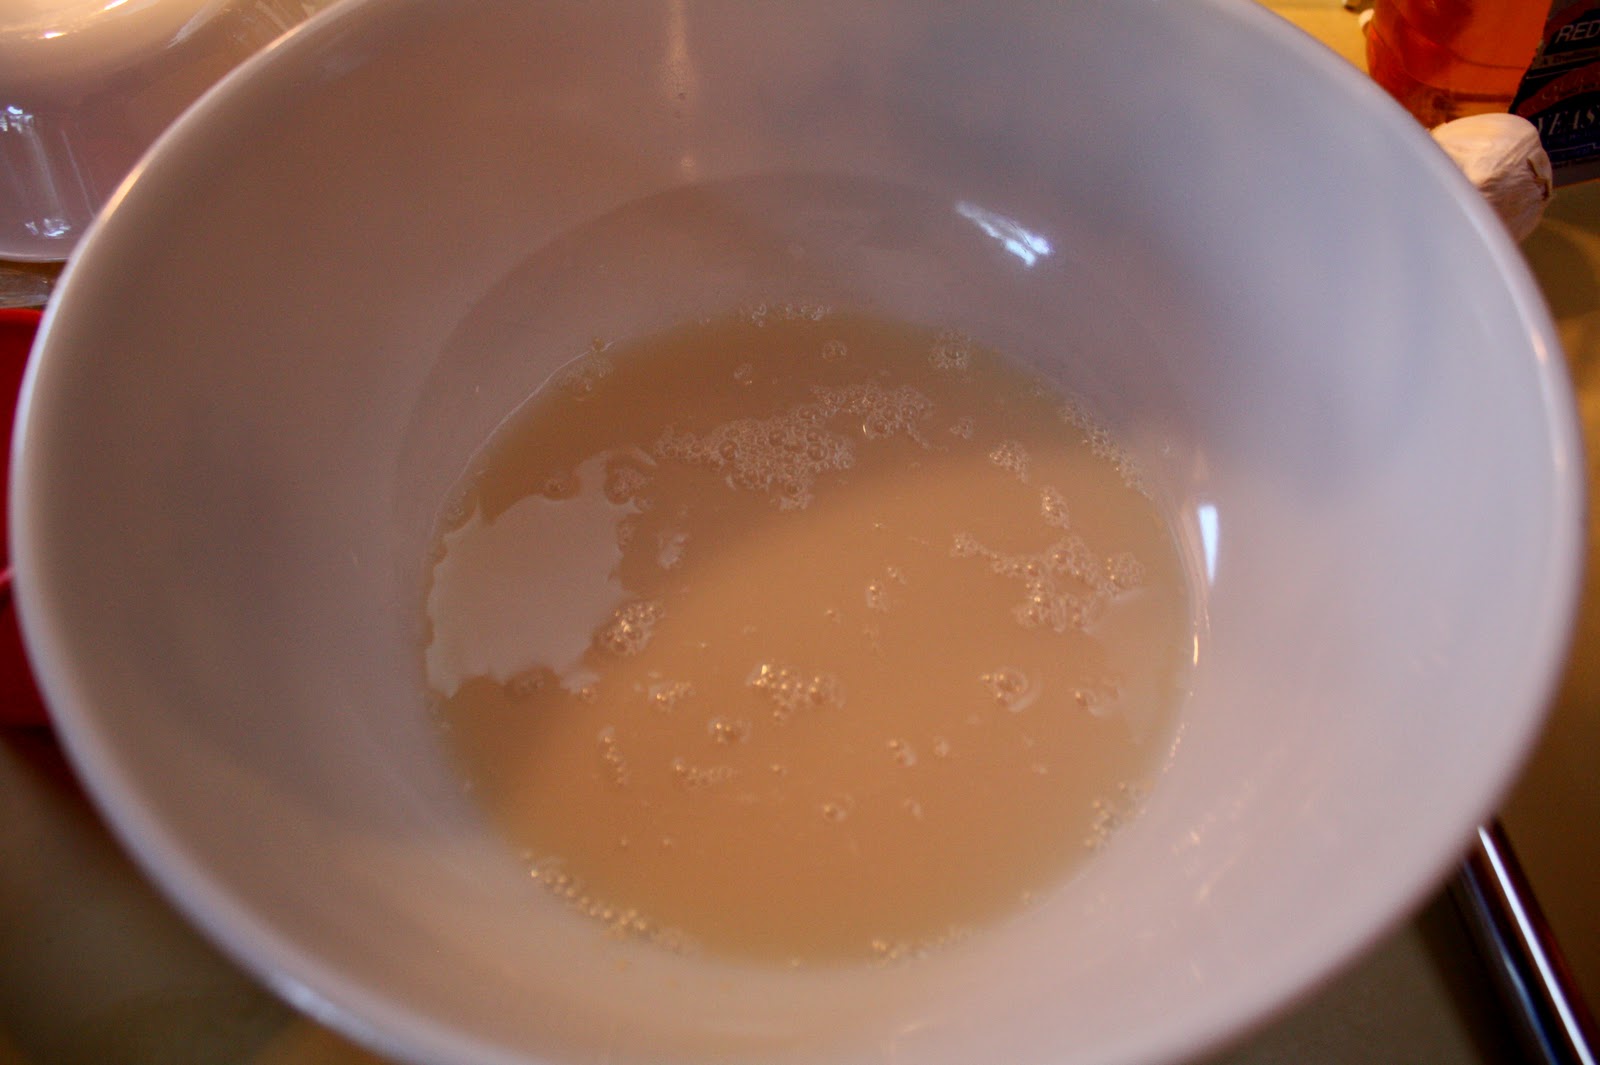
  1. Mix the yeast in the 1 C warm water and set aside for 5 minutes or until foamy.
  2. In a stand mixer with a dough hook, add the oil, egg and sugar.  Pour in the yeast water and mix together.
  3. Add the additional 1 1/2 cup of water and mix on a medium speed until combined.
  4. Add in the 7C of flour little by little (so you don't have flour flying everywhere) and mix on a medium-low speed until the flour is combined and the dough begins to form a ball.  My dough was quite sticky so I may add slightly more flour next time.  I know it seems like A LOT of flour, but it makes 1 dozen good sized buns...and everyone loves some good sized buns.  ;)
  5. Add the salt and cinnamon and mix for an additional minute.
  6. Lightly oil a medium size bowl, shape dough into ball, place in oiled bowl and cover with saran wrap.
  7. Set in a warm place and allow roughly 45 minutes to double in size (this timing was at an elevation of 5500 feet.  It will rise faster at higher altitudes and slower at lower altitudes).
  8. Preheat your oven to 350 degrees and line 2 baking sheets with parchment or grease with cooking spray.
  9. Once doubled, punch down the dough and pinch off tennis ball size pieces of dough.  If dough is sticky, do this with a slightly wet hand (I just dip mine in a bowl of warm water).  To pinch off dough, instead of ripping, use your thumb and pointer finger, wrap them around the piece of dough and bring the tips of those two fingers together.  The dough will pinch off as you do this.
  10. Place the dough balls on the prepared baking sheets, allow time to double in size (about 20 minutes at 5500 feet).  If you like, you can also brush olive oil on top of the dough and sprinkle some salt on the top.  If you proof (or let these rise) for too long, they can sometimes collapse, which unfortunately happened to my batch because I may or may not have gotten sidetracked.  I recently learned about the "finger dent test" to know if bread dough is ready for the oven.  With a floured finger, gently poke the dough.  If it begins to fill in but stops before going back to normal it is ready to go!  If the dent stays and doesn't move you have overproofed.  This isn't the end of the world, the dough just may collapse a bit and not be quite as fluffy.  Regardless, it will always be yummy!
  11. Once double in size, place in oven for about 20 minutes (take a look around 15 minutes) and bake until they are golden brown.
  12. Remove from oven and allow time to cool.  Then EAT!!!!
To make the sandwiches, just cut one roll in half and spoon as much pork on it as you would like.  No other condiments or toppings needed.
Bon Appetit!


Monday, September 3, 2012

Honey Whole Wheat Sandwich Bread

We made it!  Mt. Yale - 14,199 feet
     Happy Labor Day everyone!!  I hope you all are enjoying the long weekend and the beautiful weather (hopefully where you live you have had beautiful weather).  It has been a beautiful weekend full of fun, family, friends, and of course food!  One highlight of my weekend was climbing Mt. Yale with the greatest, most entertaining group of friends one could ask for.  Not only was it a beautiful and inspiring hike BUT we also indulged in some delicious sandwiches at the summit, hence the inspiration for this post.  Let me tell you, food (and beer) just tastes better on top of a mountain.  Cheers!

     As I believe I have mentioned previously, my goal this fall is to go without buying bread. This means a lot of experimenting, particularly in order to make sandwich bread!!  This Honey Whole Wheat Sandwich Bread is a recipe I stumbled across on a blog called High Altitude Bakes.  I halved the recipe and made some very minor changes, and it turned out delicious.


     The next time I make this particular recipe I may try to allow for longer rises (and potentially three rises instead of two).  The longer rise, particularly once the dough is in the loaf pan, will not only make for a richer, yeastier, breadier flavor but it will also make for larger sandwiches!  The texture of the grain was great for sandwiches and it held together nicely; however, the slice was about 2/3 the size of what I think of as a good size sammy.  My resulting loaf may have been more compact than the recipe I followed because I live at about 5,200 feet, and the recipe comes from someone living closer to 8,500 feet or so.  The difference in air pressure can make a big difference in the way the dough rises!

Enough rambling.

Honey Whole Wheat Sandwich Bread
Yields 1 Loaf (or 2 if you double ingredients)

Ingredients:
  • 1 C warm water 
  • 1/2 T yeast
  • 1/2 t salt
  • 1/6 C honey
  • 1/6 C canola oil
  • 1 1/2 C bread flour
  • 2 C whole wheat flour
  • 2 T vital wheat gluten
Directions
  1. Dissolve yeast in warm water for 5 minutes, or until it becomes foamy.
  2. Meanwhile, mix remaining ingredients in a stand mixer.  Add dissolved yeast and mix on low speed with the dough hook attachment until a ball forms.  *At this point, the dough should feel damp, but shouldn't be extremely sticky.*
  3. Knead dough by hand for additional minute to form into a ball.
  4. Place dough ball in medium, oiled bowl and cover with saran wrap.
  5. Allow time for dough to rise and double in size - about one hour.  *This time will vary depending on altitude.  Shorter time for higher altitudes and longer for lower altitudes.  Use your best judgement!*
  6. Punch dough down and knead briefly, only about one minute. Place in an oiled loaf pan, pushing the dough to the sides of the pan so it covers the bottom and cover with plastic wrap.  *At this point, my dough was feeling airy, easy to work with, slightly moist, but not wet, and not very sticky (if at all).  The dough has also gathered some of the oil from the bowl which helps with the stickiness factor.*
  7. Once dough is covered in loaf pan, allow time to rise.  I allowed 34 minutes until the dough was just under the rim of the bread pan. The last 9 minutes of the 34 minutes, the bread was uncovered.  The next time around, I will probably have it rise slightly longer.
  8. Preheat oven to 350 degrees.
  9. Remove saran wrap from loaf pan, if you haven't already, and bake for 20-30 minutes.  I baked this loaf for 23 minutes.  A finished loaf will be browned on top and will sound hollow when you knock on the top.  Try to do so without burning your hand!
  10. Cool on a wire rack - or cut off a small piece to have warm with a little butter and some honey!

The texture of the bread had a nice medium and fluffy grain, and the crust was firm but not too too toothy.  The wheat and honey flavors were subtle but delicious, and the bread stays together nicely which is perfect for sammys!  ...and we take sandwiches quite seriously in this household!

Don't be afraid of making sandwich bread.  Give it a try!  I promise you will be happy!

Bon Appetit!!

Friday, August 17, 2012

An Easy French Loaf


Since making bread this summer and learning a variety of techniques and methods for homemade bread from relatives and the interwebs, I decided I would not buy bread from the store for the remainder of the year.  Crazy? Possibly.  Rewarding? Definitely.  It may take some time but I can not express how satisfying it is to eat a slice of bread that you have made from scratch.  Mmmmm Mmmmmm Carbs.

Miracle Boule
Making yeast bread can be frightening, but absolute worst case, you make a loaf of dry, dense, not so delicious, or not gonna rise for you bread and you throw it away and start over.  BUT you have to start somewhere!! The good news is, all the bread I have made is atleast edible, and usually tastes good too.  So if I can figure this out, you can too!

The first yeast bread I made were pumpkin garlic knots, which my sister raves about (and I do too), BUT the first loaf I made without the use of a bread machine was The Miracle Boule, from the cooking channel.  Let me tell you, if you need a little self esteem boost about bread making, and you want to impress yourself and others, you have to try this.  It really is very easy and it is oh so delicious!!  Just make sure you start preparing one day before you plan to devour this bread.

Ingredients and materials:
  •  3 1/4C bread flour + addt'l flour for tea towel and later kneading pending stickiness of dough  *NOTE*: At sea level or lower altitudes, use 3C flour
  • 1 1/4 t salt
  • 1/4 t dry active yeast
  • 1 1/2 C warm water
  • Tea Towel
  • Dutch Oven
Directions:
Look of dough after the first rise
1. Mix bread flour, salt and yeast in medium bowl.  Pour in warm water and mix until dough is raggedy, sticky and a bit wet.  Cover bowl with a damp tea towel and let rise in a warm area for 12-24 hours.  *NOTE* - if you live in a humid environment, the tea towel can be dry but I found that in Boulder I needed the towel to be damp so the dough wouldn't dry our during this first rise.

2. After the first rise, once the dough is dotted with bubbles, dump the dough onto a well floured tea towel or other floured surface, it should be floured enough so the dough won't stick to it.  Sprinkle dough with flour, fold dough over a couple of times and cover with tea towel for 15 minutes.  If your dough is REALLY sticky after the first rise, I added additional flour (about 1/8 - 1/4 cup) and briefly kneaded the flour into the dough before covering with the tea towel.
Dough once folding in additional flour

Cover with tea towel for 15 minutes

After 15 minutes, fold into floured tea towel
3. After letting dough rest for 15 minutes, unwrap tea towel, shape dough into a ball, and fold tea towel around the dough.  Allow dough to rise for about 2 hours or until it has doubled in size.
 
4.  About thirty minutes prior to the end of the rise, place Dutch oven in the oven while it preheats to 450 degrees.

5. When dough is ready, remove Dutch oven from the oven, unwrap tea towel, and dump the dough into the warmed dutch oven so the seam side of the dough is facing up.  Shake the pot so the dough settles and return to the oven with the lid on.  Bake for 30 minutes.

6. After dough has baked for 30 minutes, remove lid and bake for an additional 15 minutes or until the top of the bread has browned to your liking.  Remove from oven and cool on a wire rack.   OR if you are like me, remove the bread from the oven, cut a nice size slice and eat it right then!!!  This probably isn't the best way for slicing the bread, but jeez, bread fresh out of the oven is heavenly!

I hope you enjoy this as much as I did!  I attempted to make a similar version with wheat bread that just didn't have the same gusto, so I recommend sticking to All Purpose or White Bread Flour. 

I shout "hooray!"
for the Miracle Boule
Yeast you can Beat, so...

Bon Appetit!!

Sunday, June 3, 2012

Asparagus, Spinach and Feta Quiche


This deliciousness is a recipe I recently found on one of my new favorite food blogs, Two Peas and Their Pod.  I had never made quiche before and when I stumbled across this recipe I just had to try it.  It was a perfect breakfast for a lazy weekend morning, and was a hit when I made it for my Mom over Mother's Day Weekend.

If you don't have a favorite pie crust recipe, I suggest using the Martha Stewart pie crust recipe here.  It makes two crusts (and the quiche only calls for one) but you can refrigerate and freeze half of the dough or you can make two quiches and freeze one for later...I promise you will want this again.

Asparagus, Spinach and Feta Quiche
Makes (1) 9" quiche  (so if you plan on making two crusts, double ingredients below and freeze one quiche for enjoyment at a later date!) 
Ingredients:
  •  1/2 T olive oil
  • 12 spears asparagus, cut into 1" pieces
  • 4 C fresh baby spinach
  • 5 eggs
  • 1 C milk
  • 3/4 C crumbled feta cheese
  • 1/4 C mozzarella cheese
  • Salt and pepper to taste
  • 4 green onions, sliced thin
  • 1 pie crust - pre-baked for about 20 minutes at 375 for a crispier crust (don't pre-bake if you don't like a crispier crust)
Directions: 
  1. Preheat oven to 375 degrees F
  2. In a sauce pan, heat olive oil over medium heat.  Cook asparagus and spinach until asparagus is tender and spinach is wilted.  Remove from heat, drain the excess liquid from the spinach and set aside (if you like, you could add a little garlic or shallots prior to cooking the veggies...I think it would taste great but not alter the flavor too much).
  3. In a medium bowl, combine eggs, milk, both cheeses and salt and pepper to taste. 
  4. When pie crust is ready (pre-baked, or chilled if not pre-baking) place green onions, asparagus, and spinach in bottom of pie crust.  Pour egg mixture over the vegetables and cover crust edges with foil (This prevents the crust from getting too brown or burning.  Remove the foil 15 minutes before the quiche is done for crust to have golden brown edges).
  5. Place quiche in preheated oven and bake for around 45 minutes or until golden brown and set in the middle.
  6. Let cool, slice, and enjoy! 
Bon Appetit!!

Thursday, January 12, 2012

Pumpkin Garlic Knots

Happy New Year Everyone!  I just returned from a wonderful trip to the Caribbean where I spent some time in St. Kitts and Nevis as well as in St. Thomas and St. JohnEach place was spectacular and unique and I can't wait to share my experiences with you.  Look for some getaway updates soon!
Ingredients for your next creation
In the mean time, I wanted to share a recipe with you that I tried during the holidays this year.  I found this recipe through foodgawker.com on the blog Handle the Heat.
This is definitely a website I plan to follow from now on and I know I will make these Pumpkin Garlic Knots for many years to come!  They were a hit at both Thanksgiving and Christmas and could easily be made throughout the year by omitting the pumpkin, although I have yet to try this.
These knots were my first attempt at a yeast bread without my trusty bread maker and it was so easy!  The knots are slightly crispy on the outside and as you take a bite you are hit with the wonderful flavors of garlic and oregano.  As you reach the fluffy middle of the bread, the garlic and oregano flavors begin to subside leaving you with slight pumpkin flavor and a whole lot of satisfaction. 


Pumpkin Garlic Knots
Yield: 2 batches - about 18 knots total

Ingredients:
  • 1 C warm water
  • 1 envelope active dry yeast
  • 2 T honey
  • 1/2 C canned pumpkin
  • 2 T plus 1/3 C olive oil
  • 1-1/2 t coarse kosher salt
  • 3-1/2 C bread flour
  • 3 cloves garlic, minced (I really enjoy garlic, so the second time around I added more)
  • salt & freshly ground pepper
  • 1/2 teaspoon dried oregano leaves
Directions:

1. For the dough: Pour the warm water into a medium bowl and whisk in the yeast. Let sit until frothy, about 10 minutes. Note-the water doesn't get extremely frothy although bubbles will be present. Whisk in the honey, 2 tablespoons olive oil, and pumpkin puree.

This is considered "frothy" in step 1
2. In a large bowl, whisk together the flour and salt. Make a well in the center of the dry ingredients then pour in your wet ingredients.

3. Using a rubber spatula, mix ingredients together. When you can no longer mix, use your hands to start kneading the dough. Knead the dough until it comes together in a smooth and elastic ball, adding flour as necessary to prevent sticking.

4. Lightly oil another large bowl and put your dough ball inside it -- flipping over once to coat both sides lightly with oil. Cover with a damp towel and let rise for about 2 hours; or until nearly doubled in size.  It is okay if it needs to sit slightly longer than two hours.
5. Preheat oven to 425 degrees F.  If you are making the knots all at once, proceed to step 6. If you plan on only making one batch, divide the dough into two equal pieces. If you're planning to use the other half the next day, just put it in a large zip-lock bag and store in the fridge. You may also freeze the dough for up to three weeks. 
6. To create the garlic knots: tear off sections of dough (2 tablespoons at a time) and roll them into a long snake shape. Tie that snake in a knot. Set aside and continue with the rest of the dough.  As you make knots, place them on a cookie sheet.

7. Once you've made all your knots, put the pan in the oven and let bake until golden brown on the tops, about 10-15 minutes depending on size of knots.

 8. While the knots are baking, in a bowl mix together the 1/3 cup olive oil with minced garlic, salt, pepper, and oregano. When the knots are done, use a pastry brush to coat the knots with olive oil mixture.

9. Serve and Enjoy!! 

Bon Appetit!

Sunday, December 25, 2011

Oatmeal Fudge Bars

The recipe comes from Chocolate Desserts: The Absolute Best Chocolate Recipes Ever, a magazine my mother-in-law showed me when we were planning the menu for a holiday party at her house.  All the food at the party was a huge hit (look for upcoming posts!) including these Oatmeal Fudge Bars.

These bad boys have a hint of espresso flavor wrapped up in all the goodness of an oatmeal cookie combined with a fudge brownie...could it get any better?  These oatmeal fudge bars take some time, but are not too difficult and well worth the calories.  Goodness in every bite!

I decided I should share this recipe after multiple people at our holiday party either commented on the deliciousness of the bars or threatened to smuggle the tray into their car.  They are a tasty treat and are perfect for holiday parties / work functions / dinner parties etc. They are sure to be a crowd pleaser!


Oatmeal Fudge Bars (yields about 3 dozen bars)
Ingredients for crust / topping:
  • 2 C quick oats
  • 2 C packed light brown sugar
  • 1-1/2 C all purpose flour
  • 1/2 t baking powder
  • 1/2 t baking soda
  • 1/4 t salt
  • 16 T (2 sticks) unsalted butter, melted and cooled
Ingredients for filling:
  • 1/2 C all purpose flour
  • 1/2 C packed light brown sugar
  • 4 t instant espresso or coffee powder
  • 1/2 t salt
  • 3 C semi-sweet chocolate chips
  • 4 T unsalted butter
  • 2 large eggs
Directions for crust and topping:
  1.  Adjust oven rack to middle position and heat oven to 325 degrees.  Line 8 inch square baking pan with foil and grease foil.
  2. Whisk oats, brown sugar, flour, baking powder, baking soda, and salt together in a large bowl.  Stir in melted butter until combined.  Reserve 1-1/2 C oat mixture for the topping.
  3. Sprinkle remaining oat mixture into prepared pan and press into even layer with bottom of measuring cup.  Bake until crust is light golden brown, about 8 minutes, potentially a bit longer.  Let crust cool in pan on wire rack, about 1 hour.
Directions for filling:
  1.  Whisk flour, sugar, instant espresso, and salt together in medium bowl.  
  2. **Don't begin the next step too early to avoid chocolate hardening**  When the crust is close to being cooled, place chocolate chips and butter in microwave safe bowl and microwave, stirring every 30 seconds or so, until the chocolate is melted, approx. 1 - 3 minutes.  Once chocolate mixture has cooled very slightly whisk in egg until combined.  Stir in the flour mixture until just incorporated.
  3. Heat oven back to 325 degrees.  Spread filling evenly over cooled crust and smooth the top.  Sprinkle the fudge with the reserved oat mixture.  Bake bars 25-30 minutes or until a toothpick inserted into the middle comes out with a few moist crumbs attached, maybe a tiny amount of chocolate, and the filling begins to pull away from the side of the pan.  It may help to rotate the pan half way through baking.
  4. Let bars cool for two hours in a pan set on a wire rack.  Remove bars from the pan using foil, cut bars into squares and serve.
Please let me know if you try these and enjoy them!

Bon Appetit!

Wednesday, July 20, 2011

Have Ripe Bananas? Two Great Recipes for Brown Nanners!


I recently began playing in an ultimate frisbee league and our team name is the Radioactive Bananas.  I am perfectly happy with this team name because
1. I LOVE bananas (I literally eat one every day, usually with breakfast)
2. Bananas have many health benefits
3. Frisbee players are very generous and often bring goodies for team members...meaning banana baked goods for everyone!!

Seeing as my team is named after one of my favorite fruits, I just had to do some banana baking.  I stocked up on bananas so I would have plenty for my morning breakfasts, while still allowing some to ripen enough for my banana baking extravaganza!  I actually went slightly overboard on the banana purchase, so I was able to make not one, but TWO delicious banana dishes.  This actually worked out perfectly because I was able to make a loaf of my great-grandmother's Banana Bread recipe for a camping and hiking trip as well as some Banana Peanut Butter Chip Cookies for the frisbee team!

The Banana Bread recipe is great because it is very simple and doesn't use any obscure ingredients that you may or may not have in your house when the banana urge strikes (like buttermilk, crisco, wheat germ, etc.).  It is a classic banana bread and is moist and delicious, not to mention I baked it at 5,000 feet with no issues!  Ask anyone on my camping trip....this banana bread is proven to be a delightful morning breakfast and it provides enough energy to power you through a mountain hike so you can eat even more banana bread while enjoying a 14,000 foot view (see photo below).

View from the top of Huron Peak - 14,004 feet

The Banana Peanut Butter Chip Cookies also ended up being a huge success and everyone on the frisbee team thoroughly enjoyed the post-game dessert....with the exception of the one person that took a bite and then told me he was allergic to bananas.  Don't worry!  He spit it out before any reactions began.  Phew!
Anyway, this recipe was adapted from Sweet Treats and More, a blog I came across when searching banana recipes on one of my favorite websites: Foodgawker.  I used peanut butter chips instead of chocolate chips, because who can resist the peanut butter banana combination?  The recipe is easily halved or doubled and they are sure to please!

Now on to the recipes!:
Banana Bread (Makes 2 loaves.  Easily halved or doubled)
Ingredients
- 2 C all purpose flour
- 1/2 C butter or margarine
- 1 C sugar
- 1/2 t baking soda
- 2 eggs
- 1/2 t salt
- 1/2 t baking powder
- 3-4 bananas mashed
- 1 C chopped nuts (pecan/walnut/mixture), optional
  1. Preheat oven to 350 degrees farenheit
  2. Mix all ingredients well
  3. Turn into 2 greased loaf pans
  4. Bake for 45 minutes
  5. Allow time to cool and serve!
Banana Peanut Butter Chip Cookies (Makes about 4 dozen)
Ingredients
- 1/2 C white sugar
- 1/2 C brown sugar
- 1 C butter, softened
- 2 eggs
- 1 t vanilla extract
- 2 C all purpose flour
- 1 t baking soda
- 1 t ground cinnammon
- 3 ripe bananas
- 2 C rolled oats
- 1 C peanut butter chips
  1. Preheat oven to 375 degrees farenheit
  2. Cream together butter and sugars
  3. Beat in eggs and vanilla
  4. Mix dry ingredients and pour into creamed mixture.  Mix well.
  5. Mix in bananas, oats and peanut butter chips
  6. Drop onto cookie sheet and bake 10-12 minutes (10 minutes makes very soft cookies)
  7. Cool on rack and serve.  Store extra cookies (if there are any) in an air tight container.

Bon Appetit!

Thursday, June 9, 2011

A Passion for Peanut Butter

Dessert of the Month, Southern Living Magazine
 It doesn't surprise me that the day I began my blog was the same day I was trying a new cake recipe for my friend's birthday!  My Mom made this delectable goodness for my recent birthday, and I envision it being something that I make often and pass down for years to come!  My cake may not look as beautiful as the one pictured in the magazine article, but I bet it tastes just as delicious, and let's be honest...that is what matters!

If you have a weakness for peanut butter and even more so for the peanut butter/chocolate combination, than this Chocolate Peanut Butter Mousse Cake from Southern Living Magazine is not to be missed! 
Amy's Birthday Delicacy
 Peanut Butter Passion Cake
  • (1) 18.25oz package of devil's food cake mix (without the pudding)
  • 2.5 C whipping cream, divided
  • (1) 10oz. package of peanut butter morsels
  • 2 t vanilla extract
  • 1 T Butter or Margarine
  • 2/3 C semi-sweet chocolate morsels
  • Garnish with Roasted Peanuts (optional)
  1. Prepare cake mix according to package directions.  Pour into 2 lightly greased 8-inch round cake pans. Bake according to package directions.  Let cool on wire racks in pan for 10 minutes, remove from pans and cool on wire racks completely.  *Note: I took straight out of the pan and cooled on wire racks with no problem!
  2. Combine 2/3 C whipping cream and peanut butter morsels in a small sauce pan.  Cook over low heat, stirring constantly, until morsels melt and mixture is smooth. Remove from heat, stir in vanilla extract and let cool 25 minutes.
  3. Beat 1 1/3 C whipping cream at high speed with an electric mixer until soft peaks form.  Stir 1/3 whipped cream into the peanut butter mixture.  Fold into remaining whipped cream.  Spread between the cake layers, cover and chill.  *Note: Make sure the cake layers are completely cool prior to spreading mixture (otherwise it will melt)!  Also, the weight of the cake can cause the peanut butter mixture to seep out of the sides of the cake.  The filling hardens once it is cooled, so don't worry about the top of the cake sliding off of the peanut butter mixture!
  4. Bring remaining 1/2 C of whip cream and 1 T of butter to boil in a small saucepan.  Add chocolate morsels, remove from heat, and let stand 5 minutes.  Stir until morsels melt and mixture is smooth.
  5. Pour glaze over cake and garnish with peanuts if desired.   Eat it warm or chilled BUT make sure you have some ice cream or milk available to balance out the rich flavor of the chocolate and sweetness of the peanut butter!!

Please note, instead of using the pre-packaged cake mix as described in the recipe, I made a chocolate cake from scratch using a recipe passed down from my great-grandmother.  It will work with your favorite Chocolate Cake recipe, so don't hesitate to start from scratch!

 Bon Appetit!