Thursday, September 20, 2012

3-Grain Breakfast Porridge with Fruit and Walnuts

Props to theKitchn for putting this next recipe online, so someone could pin this recipe so I could then admire and pin the recipe and then make it not once, but twice!!  The original recipe from theKitchn is made with blueberries and hazlenuts and was intriguing to me for so many reasons.  Keep reading to find out why I plan on making this breakfast porridge time and time again in our house (and to get the recipe)!
Reasons why you should try this recipe and then keep it around your house for years to come:
1. Delicious, obviously.
2. An unexpected twist to breakfast, and yes, sometimes I think it is nice to switch up the routine.
3. Makes mornings easier.  Don't get me wrong, I love taking my time in the morning, having a cup of coffee with my husband while we eat breakfast and peruse the offerings of the interwebs BUT this porridge is a healthy meal you can eat at home or on the run.  Don't let the "serve cold" part throw you...The Kitchn wasn't lying to me when it stated to eat this cold and allow time for all the flavors to come together as it chills in the fridge overnight.  These people definitely know what they are talking about!
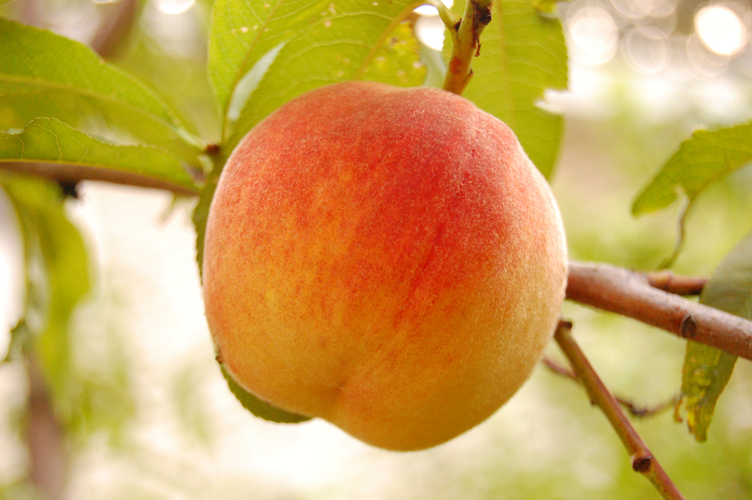
4. You can switch it up!! The first time I made this I used blueberries, the second time I used peaches and both tasted amazing!!  Other than the melon family and vegetable fruits,  I can't think of many fruits that wouldn't work in this grain salad, so you can mix it up to use what is in season or on sale at the store.
5. Healthy, healthy, healthy.  Let me tell you, nothing wakes you up to what you are putting in your cake hole than taking a nutrition class.  When you learn all about fiber, and fats, and protein, and high fructose corn syrup, and ulcers and every bodily function you can imagine, you start paying a bit more attention to what you eat.  I have always considered myself a healthy eater, but now I find myself examining nutrition labels and trying to increase and decrease certain aspects of my diet.  Which is why I decided to make this breakfast porridge over the weekend for the second time.  Check out all the health in this breakfast:
  • Quinoa, Steel Cut Oats and Millet - these are so high in fiber, and low in cholesterol and fat.  They are good sources of protein, good sources of iron, they make you feel full, they give you energy and they are rich in nutrients as well.  Yes please!!  (Plus, these are less processed then some other grains such as quick cooking oatmeal).
  • Fruit is good for you
  • Greek Yogurt - low in calories and a good source of calcium, and also provides protein.  I stick with non-fat plain Greek yogurt cause fat content can definitely get high here
  • Maple Syrup - I pretend this ingredient disappears into the goodness of the other ingredients, so no sweat....this provides deliciousness!!
  • Ginger - aids in digestion and also a good source of minerals
  • Lemon - aids in digestion and is also high in fiber
  • Walnuts - since these are one of my few sources of omega-3 fatty acids, sign me up!  Plus, even though they are high in fat...it's the good kind!  You could also get away with adding some ground flaxseed to increase the omega-3 fatty acids in this dish.  I learned yesterday that although fish are the first source, flaxseed is the next best source of omega-3 fatty acids, and omega-3 fatty acids are an area where most American's are deficient in their diet.  Let me know if you want to hear more about why these are so good for you and I can regurgitate information from my class!
Hopefully in my brief and unprofessional analysis of the ingredients in this recipe, I have convinced you this recipe is worth it.  I have made the full recipe and I have halved the recipe and both ways work well.  The full recipe makes a SIGNIFICANT amount, so if you are making this for one person I suggest halving it to make sure it won't go bad.  Half is also good for two people for two to three days.  For some perspective, the full recipe lasted my husband and I about five days and the half recipe was enough for each of us to have two bowls.

Ingredients:
  • 3 T olive oil, divided
  • 1 C steel cut oats
  • 1 C quinoa
  • 1/2 C hulled millet  *Note - on all of these grains you can make substitutions.  The first time I used rolled oats because I only had 1/2 of the suggested amount of steel cut oats and I used puffed millet (Kashi 7 grain cereal) instead of the hulled millet.  It was still delicious both ways.
  • 1 inch knob of ginger, peeled, cut into large discs (you need to fish them out of the grains later)
  • Lemon juice (the original recipe calls for lemon zest and juice, but I have never put forth that much effort and it still tastes delicious)
  • 4 1/2 C water
  • 1/2 C maple syrup
  • 1 C non-fat, plain Greek yogurt
  • 1/4 t nutmeg
  • 1 C blueberries or peaches or fruit of your choice (I think berries would work best overall)
  • Walnuts or favorite nut for topping
Directions:
  1. Heat 1 T of the olive oil in a medium/large saucepan over medium-high heat
  2. Add grains to the olive oil and heat for 2-3 minutes.  They will smell nice and toasty (but don't let 'em burn!)
  3. Once grains are slightly toasted, add 4.5 C water, ginger discs, and a healthy squirt of lemon juice - roughly 2 tablespoons (kinda guessing here)
  4. Bring this mixture to a boil, cover, turn heat to a simmer and cook on low for 20 minutes
  5. Transfer the grains to a large bowl. At this point, remove the large pieces of ginger (these are kinda spicy if you leave them in and may be unpleasant to bite into at breakfast time).  The first time I made this I minced the ginger a bit small and it tasted okay but was much gingery-er.  Once in the bowl, allow the grains time to cool.  I usually get impatient and only let them get to warm before continuing and it hasn't hurt anyone
  6. While the grains are cooling, mix the last 2 tablespoons of olive oil, another tablespoon or so of lemon juice and whisk until this gets bubbly.  Then add in your Greek yogurt, maple syrup and nutmeg and stir this creamy mixture together.
  7. Once your grains have cooled, pour the yogurt mixture into the grains and mix together
  8. Mix in your fruit of choice
  9. Put in the fridge and allow to cool overnight for your enjoyment in the morning, or for lunch or dinner.  To each his own!
  10. Eat cold (I promise it is good)!!!  When you dish yourself a bowl, top the grains with walnuts or the nut of your choice...trust me, this is key.  The original recipe mixes them in at the beginning with everything else (and also toasts the nuts) but I chose to skip the toasting and add them each time I had breakfast so they didn't get soggy.
Give this one a try.  You won't regret it!!!


Bon Appetit!

Saturday, September 15, 2012

Frozen Peanut Butter Banana Bites dipped in Chocolate

I just put these in the freezer but I am so excited about them I had to start writing this post immediately.  I am hoping these one bite desserts will be the perfect way to satiate my palate after dinner.  As long as you can limit yourself to one or two you don't have the guilt of a full dessert!
This was one of the first recipes I "pinned" and I am finally getting around to trying them.  Thank goodness for finding these treats on Nom Nom Nom Blog!

Everyone knows that peanut butter and bananas, and peanut butter and chocolate are heavenly combinations and banana and chocolate isn't so bad itself, so the three of these combined in one little frozen bite of goodness has got to be just about the next best thing to sliced bread.  Forget that, they are definitely better than sliced bread (and you all know I highly respect and love bread)!

These were so easy to throw together.  A little time consuming to get them dipped in chocolate, and then of course the wait time to allow them to freeze...it's almost more than my self control can handle, but truly these are not rocket science and are so delicious.
YUMMY!

Frozen Peanut Butter Bites Dipped in Chocolate
Ingredients:
  • 2 ripe bananas (spotted with brown but not banana bread ripe)
  • Your favorite peanut butter
  • 1/2 C chocolate chips (I used semi-sweet)
  • 2T milk
Directions:
1. Cover a cookie sheet with wax or parchment paper.

2. Slice each banana into even slices, about 1/4 to 1/2 an inch and place on a plate.

3. Using a knife, spread peanut butter over the top of each banana slice so the whole top of the slice is covered.

4. Mix the chocolate chips and milk in a microwave safe bowl and heat in 15 second increments, stirring after every 15 seconds until the chocolate is melted and the consistency is smooth.  You don't want this to be super thick (like a frosting) but you don't want chocolate milk either.  The chocolate will begin to set as it cools, but adjust the chocolate chip and milk ratio as you heat and melt the chocolate until it seems like a good consistency for dipping.
 5. Dip each slice of banana into the melted chocolate peanut butter side up.  I used a fork to transfer from the plate to the melted chocolate, used a spoon to help cover the slice, and then switched back to the fork to move the slice from the bowl to the cookie sheet. The fork was nice because the extra chocolate could drip back into the bowl rather than having all the excess chocolate on the cookie sheet if you were to use the spoon.  Do whatever is easiest for you.

6. Once all slices are dipped and on the cookie sheet, transfer to the freezer and leave there until each slice is fully frozen.  The timing will vary based on many factors, so just keep checking.  Two to three hours is probably the fastest they will freeze.  Remove tray from freezer, place slices into a airtight container, pop one or two in your mouth and freeze the rest until you want one!
    
I know I will make these again and there are two things I will try.  First, I need to put slightly more peanut butter on each slice and second, I will try to have cleaner "dips."  My chocolate took FOREVER to freeze completely and I think that may have been my issue.  Even though the chocolate is still a little messy, these gems are going to be made many a times in the future of our residence.

Bon Appetit!

Tuesday, September 11, 2012

Ham and Peach Panini


This delight comes from Southern Living Magazine.  With peaches at their prime, the magazine had a section with all sorts of ideas for peaches, everything from desserts to drinks to dinners.  My friend Amy and I were so excited about the peach recipes, we took it from my Mom and took pictures of the recipes we wanted to make for the week.  This, of course, was after we made peach mojitos to enjoy with our hubbys. 

This panini made me realize two things.
1. I need to use my panini press grill/griddle more often.  What a delightful kitchen tool!

Photo from mamliga.com
2. More importantly, I desperately wish peach season was forever and ever....even through the winter.  If I had the room, I would dedicate a separate freezer solely to storing peaches to enjoy year round.  Alas, I do not have said freezer, so I suppose I will eat as many peaches as possible during the short time they are in season each year.  Mmmmm mmmm mmmmm.

On the contrary, my current freezer is loaded with tupperware after tupperware of not peaches, but ham.  My husband and I made a ham a while back for lunch meat, and since there are only two of us and I don't eat sandwiches for lunch all the time, we have lots of ham that still needs consuming.  You can't even imagine my excitement when I saw this recipe for Ham and Peach Paninis. 

The flavors are delciously balanced between the sweetness of the peaches, the saltiness of the ham, and the sharp and tangy taste of the mustard.  It is a treat and one was filling enough for dinner.  Definitely worth the try....and so easy to assemble!!


Ham and Peach Panini
Ingredients:
Note - the amount of ingredients you use depends on how many sammy's you want to make.  Use your discretion about how much meat, cheese, mustard, etc. you want on your panini.  You know what you like!!

Country Ham-and-Peach Panini Recipe
Photo from Southern Living Website
  • Your favorite sandwich bread (ciabatta, crusty bread, something that holds together well)
  • Honey Mustard (or Dijon Mustard*)
  • Freshly Ground Pepper
  • Sharp White Cheddar Cheese (I would think provolone or mozzarella would also be good)
  • Ham
  • Peaches (2 peaches made 4 paninis)
  • Butter (or olive oil)
  •  *Honey - if using dijon mustard
Directions:
  1. Assemble sandwich
  2. Grill
Just kidding...
  1. Spread mustard on both pieces of sliced bread you want to use on your panini.  If using dijon mustard, add honey at this point.
  2. Sprinkle fresh cracked pepper over the mustard.
  3. Place sliced cheese on one slice of bread and place ham on the other slice of bread.
  4. Place peaches on one side of the sandwich and then press the two slices of bread together so all the wonderful fillings are nestled against one another (at this point, this resembles a sandwich).
  5. Brush both sides of the panini with butter (or olive oil).
  6. If using a panini press, place sandwich between press and grill until golden brown on both sides and cheese melty.  If using a pan, heat the pan over medium heat and grill one side of the panini.  When that side is browned, flip it over and grill the other side.  Sometimes covering the pan with the lid helps the cheese to get nice and melted.
  7. Consume and thank me later!!!!
Bon Appetit!


Monday, September 3, 2012

Honey Whole Wheat Sandwich Bread

We made it!  Mt. Yale - 14,199 feet
     Happy Labor Day everyone!!  I hope you all are enjoying the long weekend and the beautiful weather (hopefully where you live you have had beautiful weather).  It has been a beautiful weekend full of fun, family, friends, and of course food!  One highlight of my weekend was climbing Mt. Yale with the greatest, most entertaining group of friends one could ask for.  Not only was it a beautiful and inspiring hike BUT we also indulged in some delicious sandwiches at the summit, hence the inspiration for this post.  Let me tell you, food (and beer) just tastes better on top of a mountain.  Cheers!

     As I believe I have mentioned previously, my goal this fall is to go without buying bread. This means a lot of experimenting, particularly in order to make sandwich bread!!  This Honey Whole Wheat Sandwich Bread is a recipe I stumbled across on a blog called High Altitude Bakes.  I halved the recipe and made some very minor changes, and it turned out delicious.


     The next time I make this particular recipe I may try to allow for longer rises (and potentially three rises instead of two).  The longer rise, particularly once the dough is in the loaf pan, will not only make for a richer, yeastier, breadier flavor but it will also make for larger sandwiches!  The texture of the grain was great for sandwiches and it held together nicely; however, the slice was about 2/3 the size of what I think of as a good size sammy.  My resulting loaf may have been more compact than the recipe I followed because I live at about 5,200 feet, and the recipe comes from someone living closer to 8,500 feet or so.  The difference in air pressure can make a big difference in the way the dough rises!

Enough rambling.

Honey Whole Wheat Sandwich Bread
Yields 1 Loaf (or 2 if you double ingredients)

Ingredients:
  • 1 C warm water 
  • 1/2 T yeast
  • 1/2 t salt
  • 1/6 C honey
  • 1/6 C canola oil
  • 1 1/2 C bread flour
  • 2 C whole wheat flour
  • 2 T vital wheat gluten
Directions
  1. Dissolve yeast in warm water for 5 minutes, or until it becomes foamy.
  2. Meanwhile, mix remaining ingredients in a stand mixer.  Add dissolved yeast and mix on low speed with the dough hook attachment until a ball forms.  *At this point, the dough should feel damp, but shouldn't be extremely sticky.*
  3. Knead dough by hand for additional minute to form into a ball.
  4. Place dough ball in medium, oiled bowl and cover with saran wrap.
  5. Allow time for dough to rise and double in size - about one hour.  *This time will vary depending on altitude.  Shorter time for higher altitudes and longer for lower altitudes.  Use your best judgement!*
  6. Punch dough down and knead briefly, only about one minute. Place in an oiled loaf pan, pushing the dough to the sides of the pan so it covers the bottom and cover with plastic wrap.  *At this point, my dough was feeling airy, easy to work with, slightly moist, but not wet, and not very sticky (if at all).  The dough has also gathered some of the oil from the bowl which helps with the stickiness factor.*
  7. Once dough is covered in loaf pan, allow time to rise.  I allowed 34 minutes until the dough was just under the rim of the bread pan. The last 9 minutes of the 34 minutes, the bread was uncovered.  The next time around, I will probably have it rise slightly longer.
  8. Preheat oven to 350 degrees.
  9. Remove saran wrap from loaf pan, if you haven't already, and bake for 20-30 minutes.  I baked this loaf for 23 minutes.  A finished loaf will be browned on top and will sound hollow when you knock on the top.  Try to do so without burning your hand!
  10. Cool on a wire rack - or cut off a small piece to have warm with a little butter and some honey!

The texture of the bread had a nice medium and fluffy grain, and the crust was firm but not too too toothy.  The wheat and honey flavors were subtle but delicious, and the bread stays together nicely which is perfect for sammys!  ...and we take sandwiches quite seriously in this household!

Don't be afraid of making sandwich bread.  Give it a try!  I promise you will be happy!

Bon Appetit!!

Wednesday, August 29, 2012

Whirley-Pop Kettle Corn


 Step 1 - Make sure you own a Whirley Pop.  Not just so you can enjoy this AmAzInG Kettle Corn, but so you can ditch the microwave popcorn and opt for homemade stove top popcorn instead.  Whirley-Pop popcorn is just as easy as microwave popcorn and 75,000 times more delicious (maybe even more).  Plus, popcorn is healthier than other dessert options, and there are so many varieties in how you can flavor your popcorn!
If you already own a Whirley-Pop...Congratulations!!  You have made a solid life choice. If you don't own a Whirley-Pop, go to Bed, Bath and Beyond right now and buy one.  It's worth the $20.

I usually add oil and a little salt to my popcorn, simple and delicious.  However, I am drawn to kettle corn.  Whenever I am at a fair or festival, I can smell kettle corn from a mile away and am guaranteed to get a bag of fresh popped kettle corn, straight out of the kettle, whenever the opportunity presents itself.  I blame my Mom...she has the same addiction.
Gooey Kettle Corn Deliciousness

Anyway, this recipe provides the same satisfaction as the kettle corn from the fair.  We don't make it often, typically sticking to the simple oil and salt, but man-o-man is it a happy day when we choose to make kettle corn instead.  It all depends on if you want sweet and salty, or straight up salty.  Either way, this recipe is delicious.  I imagine we will make this well into the future, and will probably pass along the kettle corn addiction to future children (and their friends) the same way my mom passed along her addiction to me.

Whirley-Pop Kettle Corn
Technically this recipe serves 8 unsatisfied people, but it is best shared between 2 people (trust me)

Ingredients:
Only 3 ingredients + a Whirley-Pop!!!
  • 1/2 C popcorn kernels
  • 2 T oil (canola or olive)
  • 3 T sugar
  • 1/2 t salt (you can use more salt, but I found 1 teaspoon of salt to be a bit too salty.  Somewhere between 1/2 t and 1 t is probably best)
Directions:
I recommend having everything measured out prior to starting, and placing the popcorn kernels, sugar and salt in one bowl because you will add it all at one time and need to do so quickly.

  1. Pour oil into your Whirley-Pop along with two to three individual popcorn kernels
  2. Heat over medium-high heat until 1 of the 2-3 kernels pop.  This let's you know the oil is hot enough to get started.
  3. Quickly open the lid and pour the 1/2 C kernels, sugar and salt into the Whirley-Pop and begin cranking the handle on the Whirley-Pop.  While cranking, I also sometimes give the Whirley-Pop a bit of a shake to make sure the sugars and popcorn aren't sticking to the bottom. There is the option of having someone change the heat from low to high to low to high while cooking to make sure the kernels are heated evenly, although I think you can just heat over medium heat and be just fine (this only applies to gas stoves).
  4. Keep cranking, even when you hear the glorious "pop!" of the kernels, and don't stop cranking until the popping slows such that 1 second passes and you do not here a "pop"!
  5. As soon as the popping is done, immediately transfer the popped kettle corn to a large bowl and stir it around to prevent extremely large clumps of popcorn sticking together.  You can use your hands to do this, but I usually use a spoon because the popcorn will be hot!
  6. Immediately, put the Whirley-Pop in the sink with a squirt of soap and some water, and allow time to soak while you eat your kettle corn.  Don't worry, putting the hot Whirley-Pop in the water won't break anything...it will simply make clean up MUCH EASIER.  Otherwise, all that sugar sticks to the bottom and I imagine would be a pain to clean.
  7. Eat, eat, and eat some more!
  8. Thank me for your at home, as good as a fair, kettle corn experience.

I should let you know, it is possible to make kettle corn on the stove in a standard pot.  I personally enjoy the Whirley Pop because it allows you to stir the popcorn to prevent sticking and burning on the bottom of the pan, all without taking the lid off the pot.  My husband tried to convince me the standard pot is just as great as a Whirley-Pop and we ended up with popcorn kernels all over the kitchen.  Neither of us could figure out the best way to stir the kernels while keeping the lid on the pot...  I won the battle to keep the Whirley-Pop, and deep down I think he is glad we kept it around!

Bon Appetit!!

Thursday, August 23, 2012

Thai Chicken Enchiladas


I know that many people think Pinterest is useless and is just a way to waste time and think about all the crafts and trips and recipes you won't ever try.  I agree it is the central hub for procrastination nation; however, I truly think it is a wonderful tool for people to try new things, and change old habits for the better (pending user motivation).  I really try to only add pins to my boards that I really want to try, and the following recipe is the perfect example of a glorious Pinterest find.

Can't decide if you are in the mood for Thai food or in the mood for Mexican?  Have both!!!!  This recipe from How Sweet it Is was a delicious find and is definitely a must try.  My husband took one bite, his eyes opened wide (along with his stomach) and a look of pure delight spread across his face.  Don't get me wrong, he generally enjoys my cooking, but this was probably one of the best reactions to a meal ever and I knew this was a recipe to stash away with "those which we are willing to eat again" recipes.  I am more of a recipe scouring, experimental cook than a stick to the same menu, repeat old recipes cook, so it says something that I already am excited to make this again.

If you never try anything else I put on my blog, at least give these a try because they are scrump-didilly-umptious!

Thai Chicken Enchiladas
Yields: 8-9 enchiladas (Serves about 4)

Ingredients:
  • 8 flour tortillas
  • 2 boneless skinless chicken breasts, cooked.  - I boiled them for 15 minutes (or until cooked through) and then shredded as soon as I took them out of the water while still hot
  • 1T canola oil - or whatever oil you prefer
  •  1/2 yellow onion, chopped
  • about 1/3C carrots, shredded - I found it easiest to chop fine in a small food processor
  • about 1/2C cabbage, shredded - you could either chop in small food processor or slice in thin pieces
  • 4 garlic cloves, minced
  • 1/2 t salt
  • Pepper to taste
  • 4 green onions, sliced thin
  • 1/3 C chopped peanuts + whole peanuts for garnish - again, easiest to do this in a small food processor
  • 1/4 fresh cilantro - food processor style
  • 1 can coconut milk, divided into 3/4C and whatever is leftover
  • 1/3C Sweet chili sauce + about another 1/2C - This can be found in the Asian section of the grocery store where you find the water chestnuts, rice noodles, soy sauce, etc.
Directions: 
  1. Preheat oven to 350 degrees
  2. When prepping ingredients, place onion, carrots, cabbage, garlic, and salt in one bowl.  Place green onions, pepper, cilantro, and peanuts in another bowl.
  3. After prepping all ingredients, heat oil in a large skillet over medium heat.
  4. Pour onion, carrots, cabbage, garlic and salt into skillet and saute over medium heat until veggies begin to soften, about 7-8 minutes.
  5. Add cooked chicken to the skillet along with the pepper, green onion, peanut, cilantro mixture.  Mix well and cook for 1-2 minutes.  At this point, taste your creation and adjust salt as needed.
  6. Pour 3/4C of coconut milk and 1/3C sweet chili sauce into the skillet and mix well.  Remove from heat.
  7. Grease a 9x13" baking pan
  8. Take what is left of your can of coconut milk and pour some chili sauce into the coconut milk can until the level of the milk is close to the top of the can.  Mix well. *Note #1: The chili sauce will sink to the bottom of the can, so make sure you use a spoon that will aid in spooning out all the deliciousness the sweet chili sauce has to offer!  **Note #2: Keep in mind, the original recipe called for more coconut milk for the sauce for the top of the enchiladas, but I did not want to buy more than one can because I am not a fan of excess coconut milk so I used less and it still tasted great!!  Refer to the link above to the original recipe if you are interested in more sauce. 
  9. Spoon a small amount of sauce into the bottom of the pan...just enough to dot the bottom of the baking dish (but you don't have enough sauce to cover the bottom of the baking dish)
  10. Spoon equal amounts of your chicken mixture into the flour tortillas.  Roll tightly and place in the prepared baking dish.  I find placing the wrapped tortillas seam side down is most effective for keeping everything in place
  11. Spoon the remaining coconut milk mixture over the tortillas trying to cover as much of each tortillas as possible 
  12. Snack on any leftover mixture, or any mixture that fell out of the sides of your tortillas when placing them in the baking dish  =) - this step is optional
  13. Bake for 20 minutes
  14. Remove from oven and garnish with additional cilantro and whole peanuts
  15. Serve warm and enjoy your Asian Fiesta!!

When serving the enchiladas I tried to spoon some of the warm sauce from the bottom of the pan over the tortillas being served since the sauce is limited and pretty thin.
The enchiladas are filling on their own, but for future Thai Chicken Enchilada meals I may try to make some sort of salsa with an Asian inspired bread for dipping.  Yummy!

PLEASE PLEASE PLEASE try this recipe.  You won't regret it!

Bon Appetit!!

Friday, August 17, 2012

An Easy French Loaf


Since making bread this summer and learning a variety of techniques and methods for homemade bread from relatives and the interwebs, I decided I would not buy bread from the store for the remainder of the year.  Crazy? Possibly.  Rewarding? Definitely.  It may take some time but I can not express how satisfying it is to eat a slice of bread that you have made from scratch.  Mmmmm Mmmmmm Carbs.

Miracle Boule
Making yeast bread can be frightening, but absolute worst case, you make a loaf of dry, dense, not so delicious, or not gonna rise for you bread and you throw it away and start over.  BUT you have to start somewhere!! The good news is, all the bread I have made is atleast edible, and usually tastes good too.  So if I can figure this out, you can too!

The first yeast bread I made were pumpkin garlic knots, which my sister raves about (and I do too), BUT the first loaf I made without the use of a bread machine was The Miracle Boule, from the cooking channel.  Let me tell you, if you need a little self esteem boost about bread making, and you want to impress yourself and others, you have to try this.  It really is very easy and it is oh so delicious!!  Just make sure you start preparing one day before you plan to devour this bread.

Ingredients and materials:
  •  3 1/4C bread flour + addt'l flour for tea towel and later kneading pending stickiness of dough  *NOTE*: At sea level or lower altitudes, use 3C flour
  • 1 1/4 t salt
  • 1/4 t dry active yeast
  • 1 1/2 C warm water
  • Tea Towel
  • Dutch Oven
Directions:
Look of dough after the first rise
1. Mix bread flour, salt and yeast in medium bowl.  Pour in warm water and mix until dough is raggedy, sticky and a bit wet.  Cover bowl with a damp tea towel and let rise in a warm area for 12-24 hours.  *NOTE* - if you live in a humid environment, the tea towel can be dry but I found that in Boulder I needed the towel to be damp so the dough wouldn't dry our during this first rise.

2. After the first rise, once the dough is dotted with bubbles, dump the dough onto a well floured tea towel or other floured surface, it should be floured enough so the dough won't stick to it.  Sprinkle dough with flour, fold dough over a couple of times and cover with tea towel for 15 minutes.  If your dough is REALLY sticky after the first rise, I added additional flour (about 1/8 - 1/4 cup) and briefly kneaded the flour into the dough before covering with the tea towel.
Dough once folding in additional flour

Cover with tea towel for 15 minutes

After 15 minutes, fold into floured tea towel
3. After letting dough rest for 15 minutes, unwrap tea towel, shape dough into a ball, and fold tea towel around the dough.  Allow dough to rise for about 2 hours or until it has doubled in size.
 
4.  About thirty minutes prior to the end of the rise, place Dutch oven in the oven while it preheats to 450 degrees.

5. When dough is ready, remove Dutch oven from the oven, unwrap tea towel, and dump the dough into the warmed dutch oven so the seam side of the dough is facing up.  Shake the pot so the dough settles and return to the oven with the lid on.  Bake for 30 minutes.

6. After dough has baked for 30 minutes, remove lid and bake for an additional 15 minutes or until the top of the bread has browned to your liking.  Remove from oven and cool on a wire rack.   OR if you are like me, remove the bread from the oven, cut a nice size slice and eat it right then!!!  This probably isn't the best way for slicing the bread, but jeez, bread fresh out of the oven is heavenly!

I hope you enjoy this as much as I did!  I attempted to make a similar version with wheat bread that just didn't have the same gusto, so I recommend sticking to All Purpose or White Bread Flour. 

I shout "hooray!"
for the Miracle Boule
Yeast you can Beat, so...

Bon Appetit!!